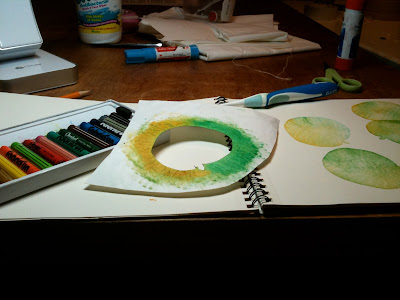
 I want to write on fabric, & have to learn some techniques first, so I signed up for a printing class at LeMoyne, but it was canceled. I decided to work by myself, using The Painted Quilt as a guide. I wrote a schedule for one technique a week, & listed the materials needed. I have to be finished by Sunday night. Stenciling was first.
Stenciling
The materials are pictured below, & at the top is my first stencil art. You need a notebook, some freezer paper from the grocery, & pastels. That was an art mystery. Turns out they're oily crayons. I used cheap (about $5) fabric crayons from DickBlick.
- Find something beautiful & simple. From my collection of dried leaves I chose a sea grape. In the book they use flower petals right off the bush.
- Fold a piece of freezer paper in half, shiny sides together, & iron to make it double thick.
- Trace around the leaf onto freezer paper.
- Cut it out. First I used a small scissors, then one of those pointy art knives.
- Rub a thick line of pastel around the edge of the shape. You can use more than one color.
- Put the shape (stencil) over the page where you want it.
- Rub the color inward toward the empty space. Use a toothbrush or your fingers. I used a toothbrush.
- Repeat. Try overlapping. Make a new stencil for each color. Don't move the stencil as you work. Clean your brushes. (I haven't; they look hopeless.)
Later I watercolored some pages before stenciling. This is a good way to envision how fabrics will look. Pretty, too. This was fun. Next: rubbings. You need wire & Paintstiks.

No comments:
Post a Comment