Showing posts with label watercolor. Show all posts

Jun 28, 2020

More class notes

1. Drawing with high-flow acrylic (or not)


High flow acrylic paint is almost like ink, except its pigment is ground fine rather than dissolved. It has the characteristics of watercolor, but it is water-resistant when it dries. I didn't have high flow acrylic, so I used Higgins Black India Ink. It is better to draw with the high flow because the images are stable. I didn't add watercolor to my drawings -- if I had the drawing lines would get smeared.

Esté calls this theme haberdashery, which in England means sewing-related. Dilute your paint with up to 50% water. Write the ABC's. Turn the letters into something sewing-related.


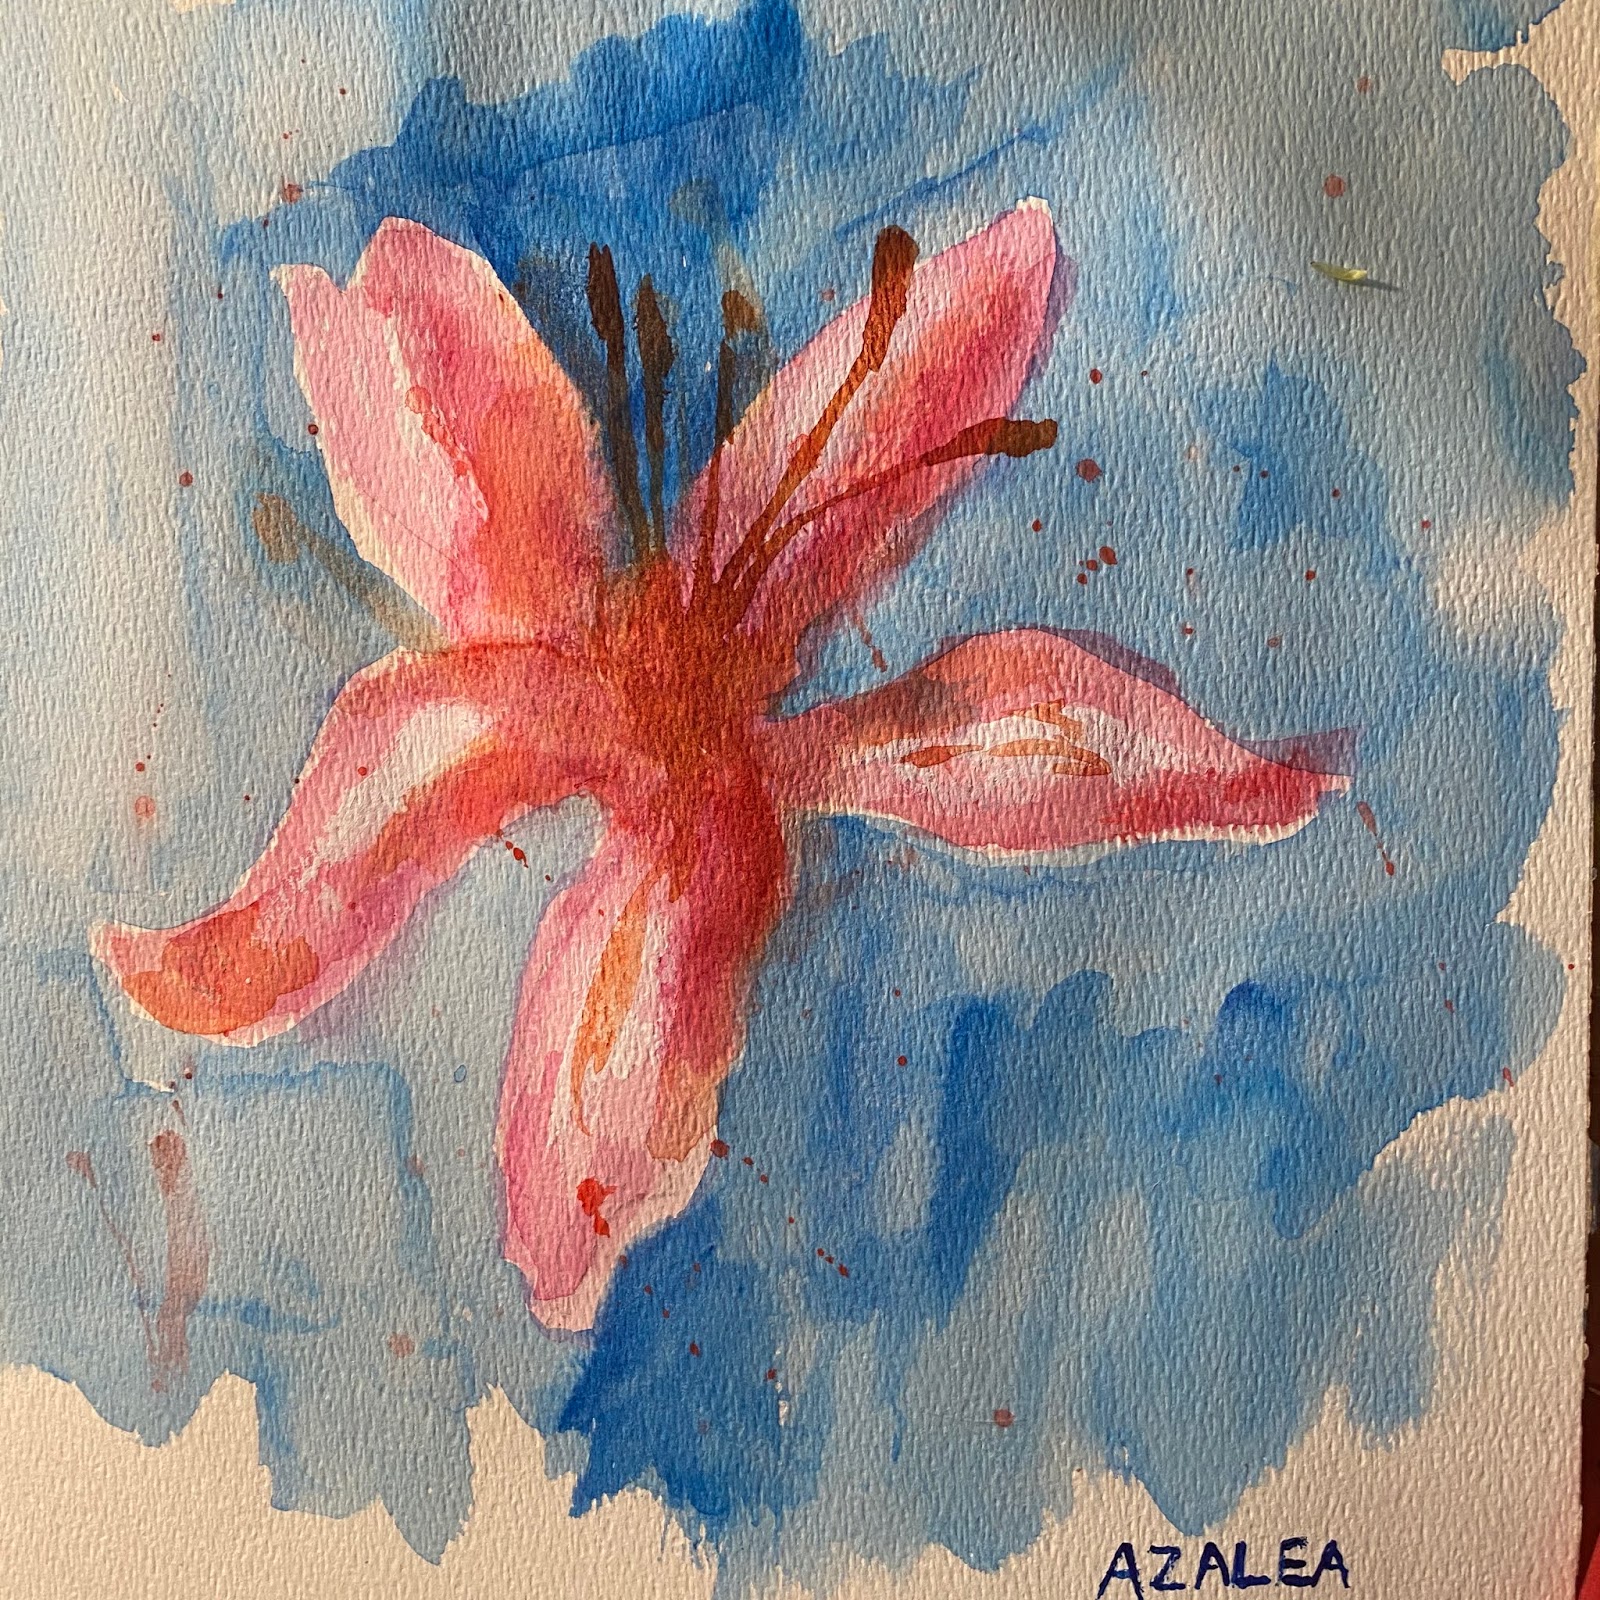
2. How to make pink with  red paint


Paint
Magenta
Pyrrole Red
Alizarin Crimson
Burnt Sienna
Quin Gold Deep

Pointed Mop Brush

Paint blossoms petal by petal. You can use the brush, your fingers, or even a mushroom. (I didn't have mushrooms, but this appeals to me.) First paint with water, then add a little paint, maybe two rosy colors, and dab it up with a paper towel. You can also dilute the paint with water and apply directly. Add details with the gold, yellow and brown BEST  after the flowers have dried.

If you want to add stems, try to mix Paynes Graywith Hansa Yellow to make a sage green.


3. Using matte medium  and learning to make good purple


Paints
Pyrrole Red
Alizaron Crimson
Magenta
Ultramarine
Pthalo Blue

Matte medium
mop brush
fan brush
dagger brush


Primary red + primary blue = flat maroon
Crimson + Ultramarine + rich purple
Magenta is essential for vibrant purple

Make teardrop paisley shapes with the mop brush.
Use the fan and dagger brushes to add texture.
Cut these shapes out and make them into stencils.

There was more to this lesson, but I didn't enjoy it and I don't like what I ended up with. Maybe I'll show you -- don't have a photo now.

The next two projects didn't inspire me, so I didn't do them. * I must have been in a low place for three days. That's easy to do with an online class offering no credit and where you don't have to look the teacher in the face. Here are my notes, and I hope I straighten up and complete the projects soon! They sound enchanting now.
*Now, a month later, I'm working on them.

4. Drawing lace, controlling that pen


1. Make lacy designs using  repeated letters of the alphabet. Practice with a fine liner -- a pen with water-resistant ink that will not smear when used with watercolor layering -- or dip pen with black acrylic ink or diluted high flow paint. See how different letters and different angles change the outcome. Move the paper around. (I think I'd like doing this! Maybe I was grumpy because I've read about lacemakers in France going blind with their work.)
2. Now get serious and cover a sheet of watercolor paper with black high flow mixed with matte medium. You shouldn't need more than a teaspoon of high flow. Esté says you can cover up a piece you don't like -- my purple paisley will see a second life!)

3. Draw lace like you practiced, using white high flow. Esté says don't dilute the white. She says you can expect it to dry on the pen, so wash the point it off regularly.


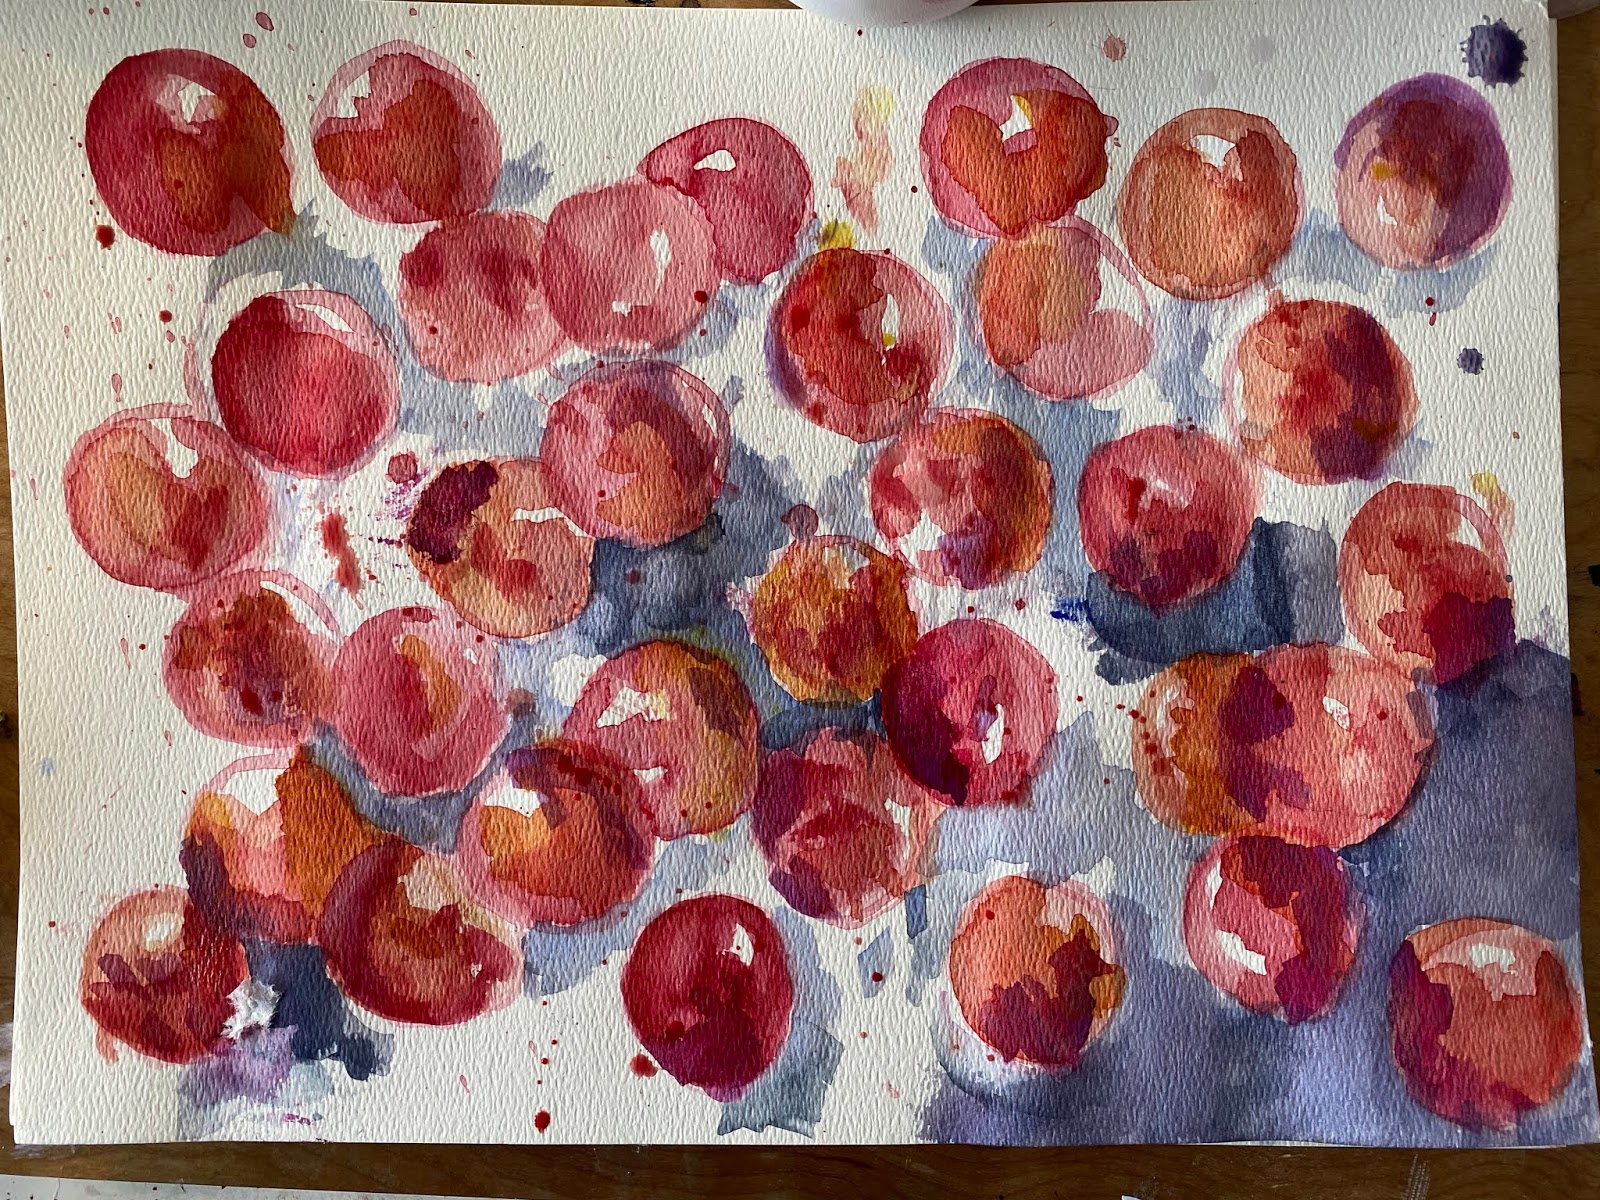
5. Making rounded shapes on flat paper or
 Tone gradations = dimension 

Paints
reds and yellows
Brushes: flat and mop

*Artist's Tip: Use separate brushes for acrylic  and watercolor.

Paint bulbous forms -- as for Christmas ornaments -- with flat brush. Start on edge, paint toward middle. Use a few colors. Add the white high flow in the center., while watercolor is still wet. But don't mix them!

6. Making paper lanterns that really glow:


Jun 23, 2020

Did you ever think of painting with an onion?

This spring I took two of Esté MacLeod's online watercolor classes. Not only is she a delightful artist, she is an effective online teacher, and I recommend her classes.  These notes are for me, and they might inspire you as well. I want to remember what I learned -- many techniques apply to acrylic and other media as well as watercolor.

1. Wet on wet


Paint
Nickel Azo Yellow -- vibrant and transparent
Hansa Yellow -- opaque, so good for final details
Paynes Grey for shading under the fruit.


  1. Draw a berry lightly if you like. Eventually skip this step.
  2. Use a pointed mop brush to create a watery form. Sop up some water with paper towel. Avoid the areas where leaves will go.
  3. Apply paint, red and yellows t, to see how they react with one another.
  4. You can also print a strawberry shape, even using a berry cut in half.
  5. Add leaves.


2. Handwriting and dip pen to create texture and shape 

Pineapple


Qunacridone gold deep and yellow ochre


  1. Write the word pineapple or some other words to create the texture of a pineapple. Connect all the letters in rows that are close together. You can write sideways too. 
  2. Use a dip pen with watercolor diluted with water. 


3. Pattern, masking, & printing with an onion!

Wet Paper
Stamping with Q-tip, TP roll, green onions!
Masking Fluid

Ultramarine, Pthalo blue, Paynes gray
fan and dagger brushes

Stamp with paint shapes in rows, Use vegetables, q-tips, 
Stamp with masking fluid
Dry completely.
Paint on top. 
Remove masking fluid when the paint on top of it is dry. 
Also, paint lines of water on the paper, leave for a few minutes so it gets absorbed. Dab paint on. Watch the paint flow.
When masking fluid is removed you can add more paint to the white parts.


Numbers inspire leaves and plants

4. Positive and negative shapes


Carbon copy paper for texture
  1. Write the numbers 1 to 9
  2. Turn the numbers into simple leaves, bigger than an inch. 
  3. Pick out favorites.
  4. Draw these again on a piece of paper. 
  5. Put the carbon paper face down on sketchbook and go ver the outlines of the leaves so there is a template of shapes in the sketchbook.
  6. Duplicate these shapes and cut them out.
  7. Arrange on blank page into a symmetrical plant shape. No overlapping!
  8. Place carbon paper on top of the plant shape laid out in separate paper forms. 
  9. Create a texture to cover the entire area. Can use your nails, pencil, stone, wood, fork...
  10. Lift carbon paper and stencil to reveal plant shape. 
  11. Paint the textured background.
  12. Create a stencil on one piece of paper to be used as a negative and positive shape.

5. Printed Wreath


Printing with potatoes, latex sponge

Yellows, viridian green, pthalo blue, paynes gray, red for accent
Mop brush

  1. Draw a light circle, using dinner plate.
  2. Print  a wreath of leaves clockwise. Use the leaf shapes cut into potatoes. 
  3. Apply paint to potatoes with a mop brush.
  4. Build up color: start with light colors and gradually add more layers.
  5. Mask sections that will be printed over. 
  6. Add details with designs painted onto a sponge, or paint directly onto the paper. May use dip pen.


6. Roundup: Tree of Life 

I didn't do this one yet...
Use some of the above techniques to create a tree. 
Keep it simple and then develop further. 
Draw in sketchbook for starters. 
Also may mix white acrylic High Flow with Paynes Gray, brown and a bit of red (for soft gray color) to create an opaque gouache.

#explorecolour


Apr 23, 2020

Talking and painting and hardly alone

Dear Family and Friends,

I just left a Zoom conversation with my friend Lesley in Philadelphia. The app intimidated me at first,
And here are the last two pieces I painted in Este MacCloud's online watercolor class.

Love,
k

#exploreshapes
#quarantine

12" x 16"
I have to give Este MacCloud credit for this countryside scene. I was practicing techniques -- the scene is hers

10" x 14"
Este MacCloud also directed this picture; it feels more like me than the one above


Apr 19, 2020

Doing great, Right?

People ask me how I'm doing and I say Great, but there's a rumbling underneath that reply, like earth before a quake. I feel the uncertainty. Is it the same for you?

Here are some photos, including more paintings from the watercolor class.  I'm still working on the final project, a simple landscape.

Mixed media
10" x 14"

Watercolor
10" x 14"

The golden poppy is California's state flower
It's blooming now
This is near the American River

Zing! this morning on Capitol Mall

A neighbor left this thyme plant at my door today


Apr 15, 2020

Painting keeps me off the streets

Hi!
I've been taking a three-week online class about watercolor. The artist-teacher is Este MacLeod, and I am learning plenty. As a retired teacher, I can see that MacLeod has got this online class stuff down perfectly. I signed up for it before the little world-wide breather we're all taking, and timing couldn't be more perfect. Keeps me busy and off the streets.

Here are some pieces I've painted in the last two weeks. The class is about materials and technique, so I'm really just following Este's directions. She encourages free gesture, putting aside the inner critic, and having fun -- all the while layering colors, working with wetness, and getting to know different  brushes.

Love,
k
#exploreshapes  #explorecolour


26 hats

26 mushrooms

weaving letters

my favorite so far
Love this kind of graceful azalea 


supposed to resemble Polish embroidery

The sun
my second-favorite so far


Feb 25, 2016

Everglades, ever glorious


Everglades = swamp = glorious

We drove through the Everglades Monday, from Miami to Cape Coral on I-75.
Shortly after I took the photo above, the grass turned to cypress swamp, tall trees with trunks that get plump where they meet the earth. Cypress are coniferous, but they are denuded in winter. I drew them as we passed through.


Feb 11, 2015

Red makes me happy


Last night I was grumpy. I hadn't touched paint or fabric all day. Guess I'm hooked on making stuff.

Today was different. I bought Gina Lee Kim's first Art Lesson from Interweave Press, and learned some tips for working the warm spectrum with watercolors. If I were serious, watercolor would scare me, but I'm not, so it's fun. All my forays down art's many avenues are for making me a better, sharper and more sensitive art quilter. But I'm loving this splashing around in colored water.

One thing painters know is to be careful mixing colors. Mixing hues on opposite sides of the color wheel makes mud.

Tip One: Because Kim is a multimedia artist, she can stick to related colors, painting yellow, orange, red, pink, and purple -- adding complements with other media. This avoids making paint mud.

2. Draw with an oil stick. It resists paint.

3. A glaze is adding color on top of dried color. It intensifies things.

4. Watercolor dries about 25% lighter.

5. Dropping color means adding a new pigment to a wet spot.

The text is from Rumi --

Welcome and entertain them all
Even if they're a crowd of sorrows
who violently sweep your house
empty of its furniture.


Blog Archive

About Me

My photo
I love to make things.